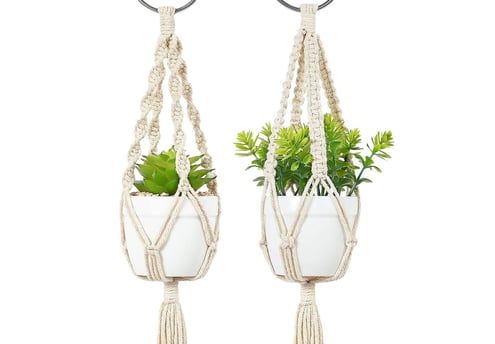
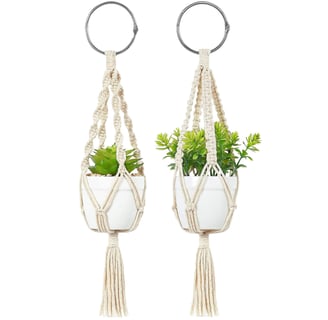
DIY Macramé Plant Catcher
Transform your home space into a boho paradise with this delightful plant catcher! Picture this: A cascading web of soft knotted cords cradling your leafy buddy, swaying gently in your lush green home. Retro vibes and handmade charm, it's a simple piece that will light up your lounge aesthetic.
MB
3/18/20252 min read
DIY Boho Macramé Plant Hanger Tutorial
Supplies You’ll Need:
Cotton macramé cord (3-4 mm thick, about 60-80 feet depending on length—natural beige or off-white works great for that Boho look
Metal or wooden ring (1-2 inches in diameter, for hanging)
Scissors
Measuring tape
Small plant pot (4-6 inches in diameter, lightweight ideally)
Optional: Wooden beads for extra Boho flair!
Step-by-Step Instructions:
Cut Your Cords
Cut 8 equal lengths of macramé cord, each about 8-10 feet long (depending on how long you want the hanger).
Fold all 8 cords in half, creating a loop at the top. You’ll have 16 strands total hanging down.
Attach to the Ring
Slip the looped end of the cords through the metal or wooden ring.
Pull the loose ends of the cords through the loop and tug tightly to secure them to the ring. This is called a “lark’s head knot.” The ring will be your hanger’s top.
Divide into Groups
Separate the 16 strands into 4 groups of 4 strands each. These groups will form the arms of your plant hanger.
Start Knotting: Square Knots
Take one group of 4 strands.
About 12-15 inches down from the ring (adjust based on desired length), tie a basic square knot:
Take the leftmost strand, cross it over the middle two strands, and under the rightmost strand.
Take the rightmost strand, pass it under the middle two, and up through the loop on the left. Pull tight.
Reverse it: Right strand over the middle two, under the left; left strand under the middle, through the right loop. Pull tight.
Repeat this square knot 3-5 times to create a knotted section.
Do this for all 4 groups, keeping the knots at the same height.
Connect the Strands
About 3-4 inches below the square knot sections, pair up adjacent groups: Take 2 strands from one group and 2 strands from the group next to it.
Tie another square knot with these 4 strands. Repeat this for all 4 sides, forming a net-like structure to cradle your pot.
Create the Basket Base
About 2-3 inches below the last knots (adjust based on your pot size), gather all 16 strands together.
Tie a big overhand knot by looping all the strands into a single knot and pulling tight. This will form the base where your pot sits.
Trim and Finish
Trim the excess cord below the final knot to your desired length—leave it long and frayed for that Boho touch (6-12 inches is typical).
Optional: Thread a few wooden beads onto the strands before knotting for extra texture.
Test It Out!
Slip your plant pot into the hanger. The pot should rest on the bottom knot, with the net of knots holding it securely. Hang it from the ring on a hook or nail.
Customization Ideas:
Colour: If you're feeling like personalising if further, you could dye the cord with natural dyes (like tea or turmeric) for an earthy Boho hue.
Length: Make it longer for a dramatic cascading effect or shorter for a minimalist look.
Details: Add feathers, shells, or more beads to the bottom strands for a wanderlust vibe.
Time Estimate:
I would say about 1-2 hours for beginners, less once you get the hang of the knots!
This plant hanger is a perfect Boho accent for any space—hang it in a corner with a trailing plant like pothos or ivy for maximum effect. Try it yourself!